
73 Not Out.
Following on from the 8 plank wagon I thought I would change scale and opt for a loco. So next on the list was an ED or Class 73 in modern terms.
These locos worked alongside steam in the early years and having a diesel engine they produced a fair amount of exhaust fumes when working in this mode.
So the aim was to produce a careworn look that needed the washers.
Equipment
Again I am going to use the Sparmax MAX-4 and the Neo for Iwata for this exercise.
Paint
I have used various enamels by Phoenix paints with a touch of Humbrol, and powders by MIG and Wilder. A little on the subject of mixing paint, I use cellulose to thin enamel paint, but thinners is fine and preferable for use with varnish, mixing is achieved by use of either a metal stirrer by hand or an electric one produced by Badger, in both cases I add the paint to my mixing jar and then thin the solution until I can get 2 drops of the end of my stirring device, the consistency has been likened to “green top milk” in the past.
In the interests of safety please always remember to wear a face mask when spraying, even if you are outside.
Items Used
Sparmax MAX-4, Neo for Iwata CN
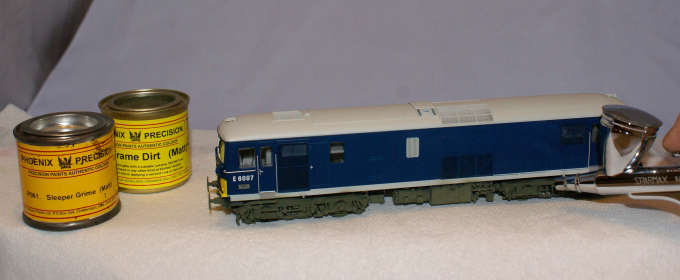
Phoenix Paints – Frame Dirt, Sleeper Grime, Roof Dirt, Matt and Satin Varnish to finish (#P960, #P961, #P962, #PV82, #PV72).
Humbrol Paint – Leather, Matt Black and Tank Grey (#62, #33, #67).
Mig Washes – Oil & Grease Mixture.
Mig / Wilder Powders – Black Smoke, Aged Rust.
Tamiya Masking tape.
Contacts/Suppliers
The airbrush company: https://www.airbrushes.com/ tel. +44 (0)1903 767 800.
Eileens Emporium: https://eileensemporium.com/ tel. +44 (0)1531 828009.
Both can supply Sparmax, Neo and Iwata airbrushes & / or compressors and are highly recommended.
Phoenix Paints: http://www.phoenix-paints.co.uk/ tel. +44 (0) 1268 730549.
Humbrol, and MIG / Wilder products can be found at good model shops or at suppliers I have used in the past who offer a good reliable service:
The airbrush company: https://www.airbrushes.com/ tel. +44 (0)1903 767 800.
SnM stuff: http://www.snmstuff.co.uk/ tel. +44 (0)1252 540 894.
Creative Models: http://www.creativemodels.co.uk/ tel. +44 (0) 1354 760022.
If you are a model railway show attendee Eileens Emporium, Phoenix Paints and Hobby Holidays (who stock MIG and all sorts of weathering and painting equipment) are regular participants at shows throughout the year.
I originally masked the loco sides to complete the frames, (Photo # 2) which you could still do until you are more confident. However I found the two airbrushes I was using providing a highly positive action so I found it was easier without the masking stage and less work!
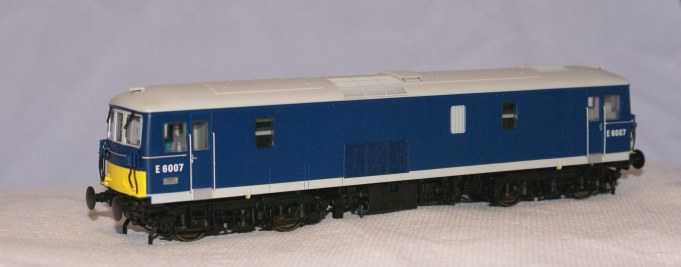
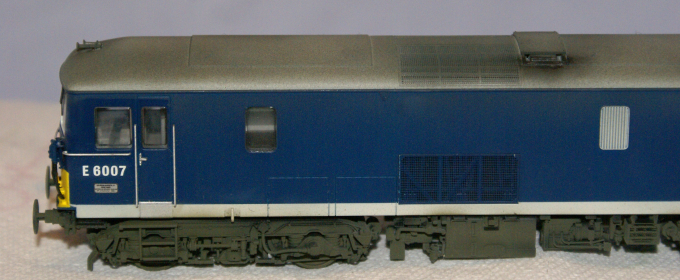
1) The loco straight out of the box, very clean with a satin finish.

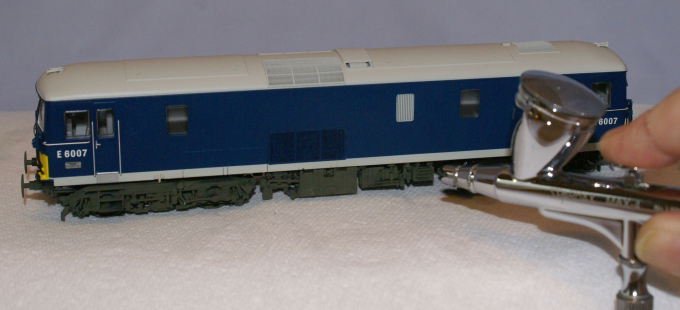
2) The finished loco as a comparison and the airbrushes used.
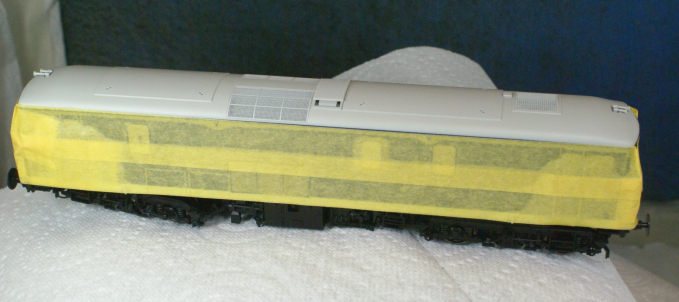
3) Masked up and ready to go, as stated in the text I omitted this step but Tamiya masking tape is highly recommended if you wish to do so.
4) The paint mix for the frames was Phoenix Frame Dirt with a touch of Sleeper Grime to add variation. I got in close with the Sparmax to ensure a good covering & rotated the bogies to ensure they were covered when taking tight curves.
5) The frames once the spraying is complete. Mig Weathering powder - Black Smoke - is used to pick out the springs and suspension.
6) The loco is then given a coat of matt varnish to enable the weathering powder and paint to grab the roof and sides more easily; it also seals in the weathering powders. The windows are masked off to ensure they are not “fogged” by the varnish.
7) The exhaust port is given a generous dab of Mig Black Smoke weathering powder with a small stiff flat brush followed by a quick burst of Phoenix Roof Dirt mixed with Humbrol 33 Matt Black. The Neo is now in use for these more delicate tasks.
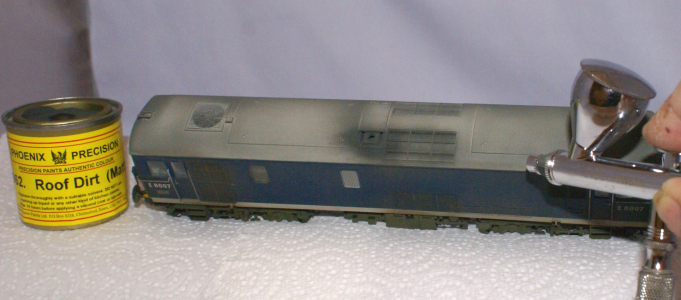
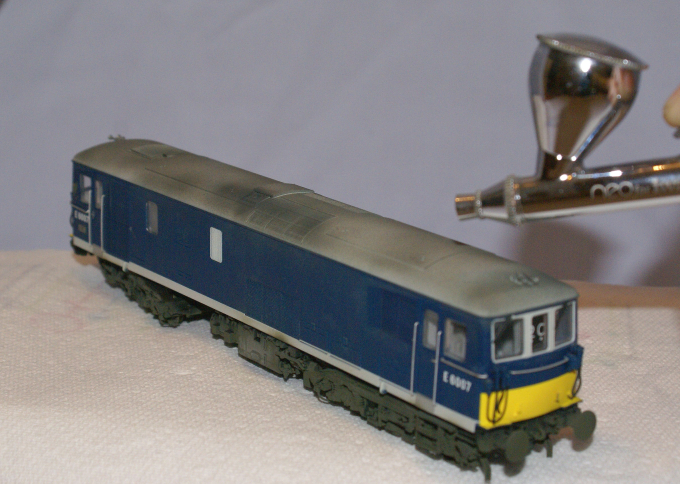
8) The roof paint is a mixture of Phoenix Roof Dirt with a little Humbrol 67 added to lighten the mixture, the constant use of the P962 enables the same consistency in tone throughout the roof process.
9) The Neo is used at a low pressure (approximately 15psi) and the roof is given a dusting with emphasis placed on the various vents and grilles. A business card is used when spraying the front ends to avoid catching the windscreen.
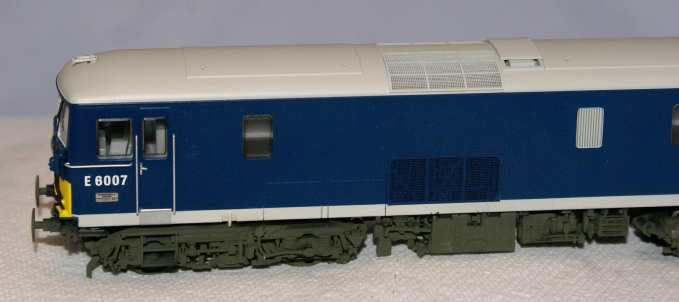
10) You can clearly see how bright the sides are now that both top and bottom of the loco have had the treatment.

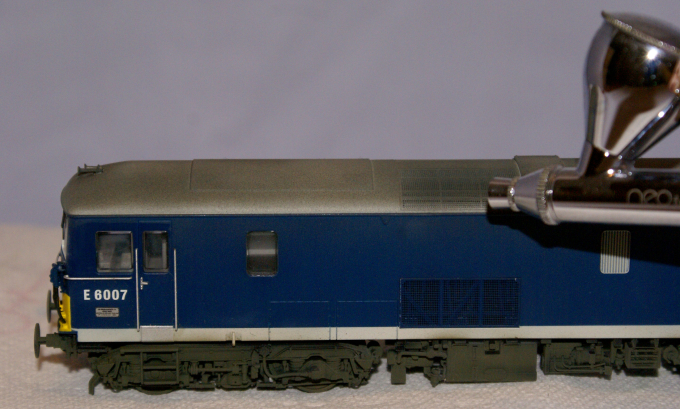
11) The sides are next, using a 60/40 mix of Phoenix Frame Dirt & Humbrol Matt Leather; enabling a constant graduated tone to be achieved. The paint is “misted” onto the loco, with particular emphasis on the side grilles, using the Neo at a low pressure, until the desired effect is achieved.
The loco buffers are given a “splodge” of oil & grease mixture and the axle boxes, fuel tanks etc are given a similar make over using a small round brush.

12) Once all is dry and the paint has hardened, I usually allow 24 hours, the loco is given a complete coat of satin varnish using the Sparmax. Please note that Phoenix varnish should always be diluted with Varnish Thinners to achieve the best results, however it can be purchased ready thinned for spraying.
Once the varnish has hardened the loco is checked for flaws and if found rectified, here the Neo scores well as the cup size is interchangeable, the wheel treads are then cleaned and the motor tested.