
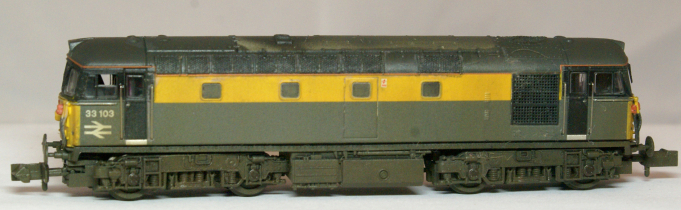
Crompton Capers – Dapol’s 33103
These were given the nickname “Cromptons” in pre–TOPS days because the main generator & traction motors were built by Crompton Parkinson with the loco being built by the Birmingham Railway & Carriage Company between 1960–1962.
Once introduced they were based exclusively on the BR Southern Region, their prime function being to work in “push – pull” mode with 4TCs & other Southern region units over non electrified lines.
The class 33’s as they were now known (or in the case of the 33/1’s “Bagpipes” because of their multiple working mode pipe work) were relegated to civil engineers duties in the late 90’s and often only saw work at the weekends.
They were very often stored at Hither Green depot in London during the week & so the aim was to produce a loco that had not seen a paint shop for a few years but one which was not overly hard working.
This particular loco was built in July 1960 as D6514, renumbered in December 1973, & withdrawn from BR service in February 1997. The loco is currently preserved.
I decided to give the loco a more day to day appearance using a mixture of weathering techniques & process.
Equipment
The Neo for Iwata CN was used for this exercise, as the needle & nozzle are 0.35mm which delivers a delicate touch, & as the amounts of paint used are less in this scale, the smaller interchangeable cup comes into use.
Paint
I prefer to use enamels by Phoenix paints with a touch of Humbrol, and powders by MIG and Wilder. Although acrylics are fine if that is your preference. As usual I will be thinning the enamel paint with cellulose, but thinners is fine and a “must” for use with varnish.
In the interests of safety please always remember to wear a face mask when spraying, even if you are outside.
Items Used
Neo for Iwata CN
Phoenix Paints – Frame Dirt, Sleeper Grime, Roof Dirt, Matt and Satin Varnish to finish (#P960, #P961, #P962, #PV82, #PV72).
Humbrol Paint – Leather, Matt Black and Tank Grey (#62, #33, #67).
Mig Washes – Oil & Grease Mixture, Cold Grey & Warm White Wash.
Model Mates Black Soot weathering liquid.
Mig / Wilder Powders – Black Smoke, Aged Rust.
Tamiya Masking tape.
Contacts/Suppliers
The airbrush company: https://www.airbrushes.com/ tel. +44 (0)1903 767 800.
Eileens Emporium: https://eileensemporium.com/ tel. +44 (0)1531 828009.
Both can supply Neo and Iwata airbrushes & / or compressors and are highly recommended.
Phoenix Paints: http://www.phoenix-paints.co.uk/ tel. +44 (0) 1268 730549.
Humbrol, and MIG / Wilder products can be found at good model shops or at suppliers I have used in the past who offer a good reliable service:
The airbrush company: https://www.airbrushes.com/ tel. +44 (0)1903 767 800.
SnM stuff: http://www.snmstuff.co.uk/ tel. +44 (0)1252 540 894.
Creative Models: http://www.creativemodels.co.uk/ tel. +44 (0) 1354 760022.
If you are a model railway show attendee Eileens Emporium, Phoenix Paints and Hobby Holidays (who stock MIG and all sorts of weathering and painting equipment) are regular participants at shows throughout the year.
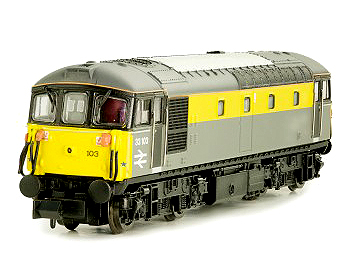
1) The loco straight out of the box, pristine with a nice satin finish.
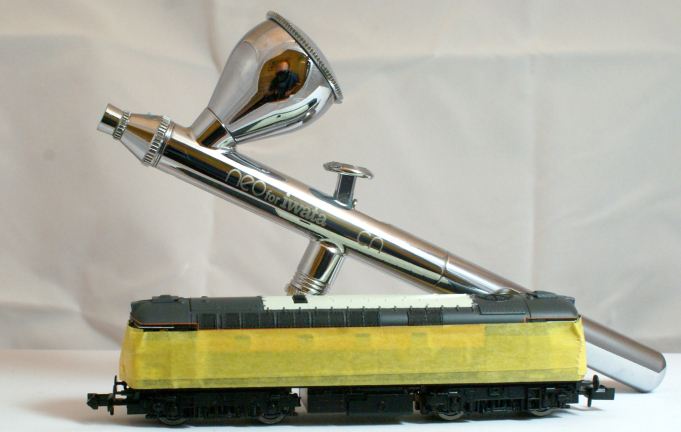
2) I originally masked the loco sides to complete the frames, as with N gauge, the margin of error for overspray is greatly reduced. Once this was completed I then proceeded by having just the windows masked.
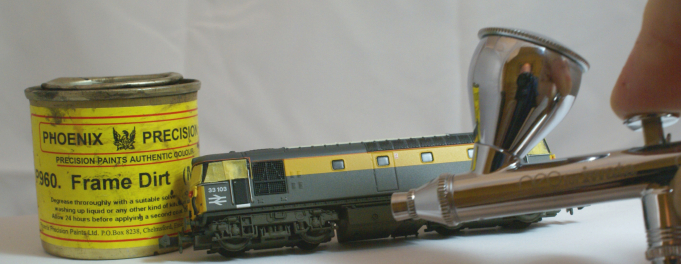
3) The paint mix for the frames was Phoenix Frame Dirt with a touch of Sleeper Grime to add variation. I got in close with the Neo which has a crown cup enabling close up work without splatter.
4) The frames once dry were over sprayed with small amounts of Humbrol tank grey & Model Mates Black Soot.
Mig Weathering powder - Black Smoke & Aged Rust are used to pick out the springs and suspension.
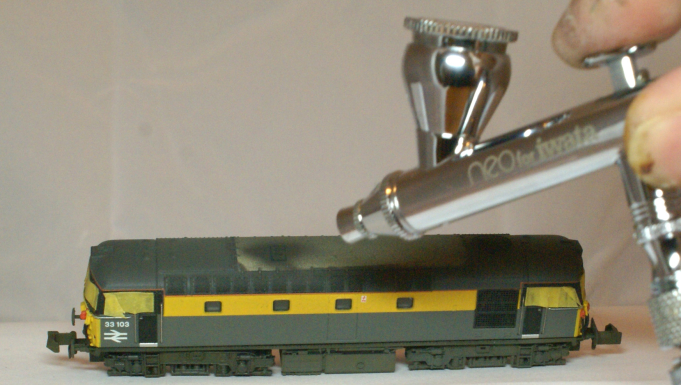
5) The exhaust port is given a generous dab of Mig Black Smoke weathering powder with a small stiff flat brush followed by a quick burst of Phoenix Roof Dirt mixed with Humbrol 33 Matt Black. The Neo is excellent for this type of work.
The air brush pressure is then reduced to 15psi and the roof is given a dusting with emphasis placed on the various vents and grilles.
The paint is a mixture of Phoenix Roof Dirt with a little Humbrol 67 added to lighten the mixture, the constant use of the P962 enables the same consistency in tone throughout the roof process.
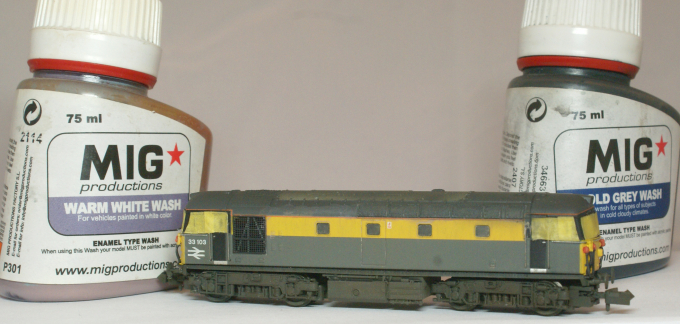
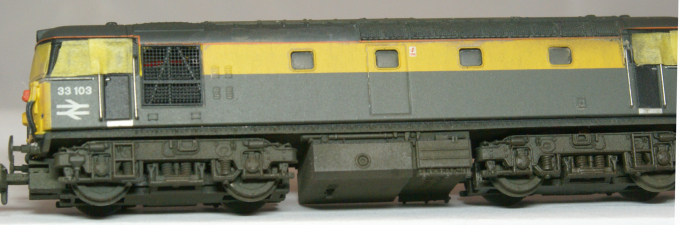
6) Mig Warm White wash was then liberally brushed over the yellow “Dutch “stripe to help fade the colour, using a flat sable brush. Excess was removed with several Johnsons cotton buds.
Once this was dry another MIG wash – Cold Grey, was applied to create streaks & runs down the body sides, again with a sable haired flat brush.
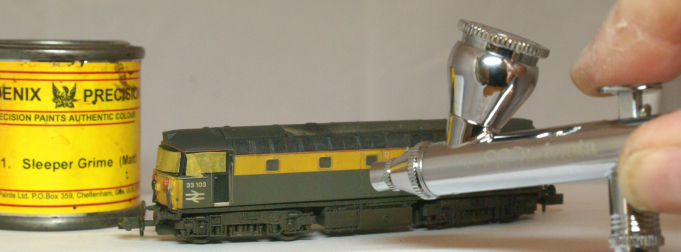
7) The overall sides & front yellow warning panels are next, using a 60/40 mix of Phoenix Sleeper Grime & Humbrol Matt Leather; enabling a constant graduated tone to be achieved.
The paint is very lightly “misted” onto the loco, this brings the effects the washes have had together but will still leave a reasonably clean loco. The loco buffers are treated to a touch of oil & grease mixture using a small round brush.
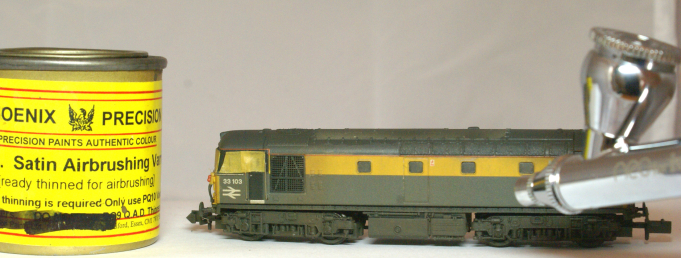
8) Once all is dry and the paint has hardened, I usually allow 24 hours, the loco is given a complete coat of satin varnish using Phoenix varnish should always be diluted with Varnish Thinners to achieve the best results.
Once the varnish has hardened the loco is checked for flaws and if found rectified, the wheel treads are then cleaned and the loco tested.
9) The finished loco.